Pages

Tuesday, 31 May 2011

Liebster Blog Award!


Last week I was nominated for a Liebster Blog Award, which was really lovely. The idea behind this award is to gain more recognition for your blog. It is given out by other bloggers who have received the award themselves to people with less than 300 followers who deserve a little extra recognition for all their hard work! Once you have received the award all you have to do is link back to the person that nominated you and then choose three other bloggers you would like to give the Liebster Blog Award!

So first of all I would like to say a huge thank you to Lauren from Budget Beauty Queen for awarding me with a Leibster! I came across Lauren's blog through #bbloggers (which is a twitter chat that takes place on Sundays between 8pm and 9pm and is for beauty bloggers to talk to each other and get advice on chosen topics) a few weeks ago, she is such a friendly person and her blog completely reflects that! She has recently been to Paris so I have loved seeing what she got up to whilst she was there! So if you haven't seen her blog already then please take a look, it's definitely well worth a read!

It has taken me a week to decide who to award as I have so many blogs that I LOVE!! But I have finally chosen my three!

  1. Joanne from The Make Up Fairy. I love Joanne's blog, she covers literally everything girlie, from make up and nail tutorials, fashion and even home décor! I think she was one of the first bloggers that I chatted to on twitter and she is super friendly. I feel like we like a lot of the same things so reading her blog is great! A definite must for your bloggers list!
  2. Sophia from Sophia Susannah Rose is awesome! Sophia is fairly new to blogging and due to finishing her degree hasn't been able to post much but now that she has finished her studies she is in full blogging mode! Again this blog covers all things girly plus she is part of the YouTube gang too! She's currently doing posts on lipsticks "five days, five lip stick looks!" anything make up related sounds great to me!
  3. Em from Its Em, now I have to say the fact that she posted some seriously HOT eye candy on her blog may have helped me make my decision (only joking)! I love her blog as it covers a variety of things including make up and fashion. One of my favourite things is that she has done a couple of posts called "getting to know you" which interview other bloggers and help them get recognition! 
There are so many great girls out there that work so hard on their blogs and if I could I would list them all so a huge shout out to all of you!  I really hope you like the blogs I have chosen for the Liebster award as much as I do! I hope you share the love and follow them too, they deserve every follower they get!

Stay Gorgeous

Grace x


Friday, 27 May 2011

Weekly Blog Round Up - week 9

Its that time of the week again! Take a look at the round up of blogs from this week.


The Nail Addict created this juicy water marble design http://thenailaddict.blogspot.com/2011/05/orange-water-marble-design.html


Grace was inspired by Lagerfeld to create this design http://ooooohpretty.blogspot.com/2011/05/nails-fit-for-harvey-nichols.html

Nic was absolutely besotted with Absolutely Alice http://nicnacksnails.blogspot.com/2011/05/i-finally-tried-it.html

Jen let her sunny disposition show with her new Zoya http://moondancerjen.blogspot.com/2011/05/pippa-my-new-obsession.html

Theresa explains exactly what Shellac and Gelish semi-permanent polishes are http://theresabloor.blogspot.com/2011/05/what-are-shellac-and-gelish-nails.html


Avast me hearties! Claire tried out OPI pirates’ collection and the wicked silver shatter http://toptwentynails.blogspot.com/2011/05/opi-pirates-of-caribbean-with-silver.html

Ari use pastels for a cute nail art manicure http://ari-sweetdelight.blogspot.com/2011/05/pastel-cute.html#more

I hope you have all had a great week.

Stay Gorgeous

Grace x

Thursday, 26 May 2011

Nails fit for Harvey Nichols!

Last night I went along to Harvey Nichols in Bristol for a shopping event (more browsing for me!). As you would expect there were plenty of fashionistas browsing through the designer labels whilst sipping on the free flow of champers. My favourite part tends to be the Bags, Accessories and Beauty and they didn't disappoint! After testing all the products until we ran out of skin, spraying perfumes which created a concoction that will never be made again and testing nail colours we made our way through the store multi coloured nails and all!
 Harvey Nichols are renowned for the elaborate window displays which at the moment are full of sparkly telephone boxes, flamingos, giant dice and lots more!
 As you walk in you are greeted by giant lipsticks, huge make up brushes and a manikin who has compacts for hair! Unfortunately they don't sell the giant lipsticks!  

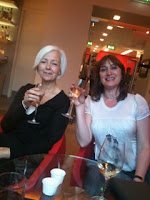
My gorgeous mummy and
my friend Sarah (take a look at her blog) 
 We had to stop for a rehydration break! Champagne is liquid so I'm sure it counts, although it was a lime and soda for me (being on crutches and pain killers is a real fun stopper!)
Once we emerged from our pit stop we were right by the food court, one of the first displays I saw was the Diet Coke bottles that have been designed by Karl Lagerfeld. They were so pretty in stripes and dots and they gave me inspiration for a nail design!


For my base I used Alpine Snow from OPI and then used a pink nail art paint for the stripes and a black nail art paint with a dotting tool for the dots on my ring finger!
This is probably one of the simplest nail designs I have ever done and it literally took no more than five minutes!
I think its really cute but it would look even better holding one of the bottles whilst sipping away on your diet coke!

I hope you like it, and if you have been to a Harvey Nichols event this week I hope you had fun!

Stay Gorgeous

Grace x 

Tuesday, 24 May 2011

Blog Lovin!

<a href="http://www.bloglovin.com/blog/2421119/oooooh-pretty?claim=sbzayjf5uef">Follow my blog with bloglovin</a>

Hey lovlies,

This is a really short post to say that you can now follow my blog by using Blog Lovin! Please ignore the code above I had to put it in so that the Blog Lovin website could find my post!

I have noticed that a few other people use their site so I thought I would give it a go too!

If you want to take a look or sign up yourself just go to http://www.bloglovin.com/

Stay Gorgeous

Grace x

Monday, 23 May 2011

Make Up Monday - Mascara Review

This weeks Make Up Monday is going to be a review on the new Volume Fast and Perfect mascaca from Bourjois.

I have used the same mascara for about three years and I really love it but unfortunately it has been reformulated and it's just not the same!  So I have been desperately trying to get the lasts bits that I can out of the tube whilst I have been searching for a new one.  A few people recommended different mascaras to try but there was one in particular that sounded very intriguing and that was the Volume Fast & Perfect mascara which is one of Bourjois newest products to be launched. And better still it was on special offer at Boots for £7.99 instead of £11.99!

The idea behind this product is that it will give you the false lash effect in 30 seconds, it claims to replace your make up artist as it can give the result they would!

The main feature is that the mascara wand rotates at 360 degrees which will coat the lashes from root to tip and guarantees no clumping!

Well, They have set themselves a lot to live up to and in my opinion they haven't quite managed it!
As I pulled the wand out of the tube I noticed there is still quite a lot of mascara on the brush and when I started to apply it to my lashes with the wand rotating it definitely proved to be too much mascara! It was hard to apply with out getting it on the skin of my eye lid and unfortunately it did go on in clumps! I didn't want to write it off straight away so I took it off and tried again, This time though I applied a layer normally and then switched the wand on to rotate to give a second coat! It definitely did give a better result by doing it this way but it was still slightly clumpy. I didn't feel it gave much volume but my lashes are quite straight so I'm sure if I used my lash curlers before I would see a better result.

 This is before (sorry I forgot to turn the flash off!), I have no mascara on at all
And this is after, my lashes are slightly more grouped together rather than all spread out!

The great thing about this product is how black it is!  Its really dark and gives more definition to the eyes. It also has great ingredients in that help condition your eyelashes which include natural waxes, Vitamin E and Jojoba, all of these will help to keep your lashes soft and its suitable to sensitive eyes!

I really really wanted to like this mascara but have to say I am disappointed with it, but I am going to persevere with it, you never know it may grow on me! The idea behind it is great but I don't think it has replaced the false lashes just yet! 

Have you tried this mascara? What do you think? Would be great to hear other peoples feed back or maybe you have some tricks for better application?

Stay Gorgeous

Grace x

Friday, 20 May 2011

Weekly Blog Round Up - week 8

It's Friday again so it's time to take a look at what the beauty blog round up girls have been up to this week!


Claire’s tutorial shows the simple way to do a half moon manicure http://toptwentynails.blogspot.com/2011/05/moon-manicure-tutorial.html

Nic celebrated finishing the school year with some swatches http://nicnacksnails.blogspot.com/2011/05/recent-notd-swatches.html

Sharon showed us her adventures in drag marbling http://polishinfatuated.blogspot.com/2011/05/drag-marbling-take-two.html

Grace had some fun with glitter to great effect http://ooooohpretty.blogspot.com/2011/05/oooooh-glitzy.html

Ladyluck took a break from her nails this week and created an eye look http://ladyluckbeauty.blogspot.com/2011/05/spring-makeup.html


And finally introducing Erin to the blog world http://sugarstar.host-ed.net/blog/

Have a great weekend!

Stay Gorgeous

Grace x

Thursday, 19 May 2011

Dazzling!

I'm sure that almost every one has heard of Barry M cosmetics, They are known for being colourful and affordable and certainly live up to the rep!

I remember when Barry M was first on the market (quite a while ago) I saw the brand as a bit cheap and with that came the assumption that the products wouldn't be any good, well I'm the first to admit when I'm wrong and this is one of those times, I couldn't have been more wrong in fact!

I always notice the Barry M stand as all the bright colours practically explode off the shelves which is great as now its fashionable to be more daring with the colours you use for your make up.

One of my favourite products from their range are the Dazzle Dust Pots, they come in over 60 colours ranging from subtle to the brightest you have ever seen. The product has been designed to use on the eyes, cheeks and lips and cost around £4.50, so you get a lot for your pennies!
These little pots of magic are perfect for creating fashion looks with out spending huge amount of money and with their versatility your creative side can run wild!  One of my favourite shades is Cherry Red 84, I used this to create a red velvet lip, rather than having my lips all glossy it gave them a velvet finish which I think is gorgeous (the lips that is, not me!).


If you would like to see how I got the finished look please take a peek at my tutorial video!

Have you tried Barry M Dazzle Dust? What's your favourite colour? Do you recommend any other products from their range? Let me know your thoughts.

Stay gorgeous

Grace x

Wednesday, 18 May 2011

Oooooh Glitzy!

Whilst clearing through a box of nail art things that I hadn't seen for ages I found a whole box full of pots of glitter in a huge variety of colours! There was even one to match the nail vanish I had on which is a peachy/coral colour so I thought I would come up with a design that was extra glittery!


The idea with this design is that the glitter is fuller at the tip and less as you go down the nail, giving it a gradient effect.  To get this look I applied Orange Soda from 17 as my base colour and then using a gold glitter nail art paint I dabbed it on to the nail, whilst this was still wet I tapped some burnt orange glitter on top. To get the gradient effect I just applied more to the tip with the orange glitter and then as you look down the nail it fades out to the gold.
On my ring finger I added a couple of gold nail gems - as you can never have too much glitter!  You could add the nail gems to all your fingers, do what ever takes your fancy!

I did the same design using a few different colours so you could see what it would look like, they are on a nail art wheel (I didn't feel like having multi coloured nails!)

I tried to take the photos in different lights but unfortunately my camera hasn't picked it up very well so sorry they aren't the best quality, I think it may be the glitter?!
For these I used  Done Out In Deco (lilac) with purple glitter and Purple nail gems, Russian Navy (navy blue) with lilac glitter and light purple nail gems and Cuckoo For This Colour (green) with silver glitter and clear nail gems.  All the varnishes are from OPI.

This design will work with any colour so you really can put your creative spin on it.

What do you think?  Do you have any glittery nail designs to share?

Stay gorgeous

Grace x

Tuesday, 17 May 2011

Top Knot!

I wont deny it, I am a huge fan of the hit TV show The Hills, every time I watched it, it made me want to be Lauren Conrad a little bit more each time.

Well I may not be able to live the life she does and probably wont ever have the money she does either (although I am still working on that one!), but one thing I can embrace is her style!

On the cover of one of her books Style Lauren has her hair styled in a Top Knot (or Bun depending on what you like to call it!) and I think it looks Stylish and elegant and its the kind of style you can wear for all occasions.

I have tried to recreate this look a few times but despite the fact I have very thick hair it always looked too small and almost ballerina like which is not what I was going for.
Whilst I was rummaging through some of my hairdressing things I came across a doughnut ring which I normally use when I'm doing up do's for brides. I thought with a bit of back combing and the doughnut ring my problem was solved.......Big Bun here I come!


I finally got the look I was going for and although I look nothing like her I feel very Lauren-esc!  I have had a fringe since I was fourteen so sporting a hairstyle where my whole face is exposed was a tad odd at first but now I've gotten used to it I love it!

I love that I can just throw my hair up like this and go, its so simple and takes about 3 minutes to do!
To take this look from day to night all you would have to do is add in a hair accessory and your look will go from casual to glam in seconds!

To see how I achieved this look watch my video tutorial.

What do you think of this style? Are there any celebrity styles you have tried? Or any you would like me to do a video/post on? Let me know.

Stay Gorgeous

Grace x

Monday, 16 May 2011

Make Up Monday - Make Up brushes!

Hey Guys,

Well with it being the start of a new week that can mean only one thing..... that it's Make Up Monday!
Today's post is about Make Up Brushes, which ones you use for what and how to look after your brushes.  It has been requested a couple of times by some of my lovely followers and as it fits in perfectly with make up Monday I thought I would do the post today!

I wanted this post to be for everyone so I haven't used expensive brushes in my photos and I certainly don't expect people to rush out and buy MAC or Sigma brushes to use everyday.  I have used a variety of brushes some are from the chemist, some where from gift sets that you get at Christmas and some are even from my college kit that I had when I trained (far to many years ago!) as a beauty therapist!  Some of you may have a vast collection building up but I'm going to show you the essential brushes to need to cover all areas of day to day make up!

Foundation Brush (L) & Concealer Brush (R)
FOUNDATION BRUSH: This is used to apply an even, full coverage of foundation. I am currently using a rounded foundation brush which is good but I prefer a flat head brush. The reason for this is that with the one pictured it tends to leave streaks in the foundation which you need to blend it with your hands after, with a flat brush you can use circular motions to get a good even coverage.
CONCEALER BRUSH: Its always best to choose a smaller brush that has tapered, firm bristles. This will ensure you cover just the area you need to but also allow you to get a good coverage.
Powder (L) Bronzer (M) Blusher (R)

POWDER BRUSH: My next step would be to set my foundation and to do this I use a large fluffy brush, this will give a good coverage and as the bristles are fluffy it means that you wont end up with too much product on your skin!
BRONZER BRUSH: When applying bronzer I tend to use a brush that is very similar to my powder brush but it's smaller, again the soft bristles will diffuse the colour evenly, not leaving too much product on the skin (remember less is more with bronzer!)
BLUSHER BRUSH: I love to use a slanted blusher brush, this is a great way to contour the blusher to give the illusion of really defined cheek bones.
Large & Medium eye shadow,
Sponge applicator and Slanted
shading brush.
EYE SHADOW BRUSH: You will see I have two in the photo, one is large and this would be used for applying your base colour to your eye lids. The second is slightly smaller and this would be used for applying your darker shadows where you would be creating more detail i.e a smoky eye effect.
SPONGE APPLICATOR: These are great when using a highly pigmented eye shadow, it will allow you to pat the colour on so you keep the colour in place!
SLANTED SHADING BRUSH: This brush is quite small but is great for shading in the crease of the eye and for lining under the eye lashes and along the upper lid to give the effect of eye-liner.

Lip Brush


LIP BRUSH: I don't always use a lip brush but it's always useful to have one in your collection. Using a lip brush will ensure a precise application of colour, so is great to use when you are wearing a vivid red or shocking pink.
Always try to choose one that has firm, tapered bristles, this will give you more control when applying the colour.

CLEANING!
One of the most important things to do when it comes to make up brushes is clean them!  Even if you only use your brushes on your own skin there will still be a build up of make up and bacteria!  So I use two different products for this, on a regular basis I use MAC brush cleanser, all you do is pop some product onto some cotton wool or tissue and swirl the brush into the liquid and that will remove any excess make up.  For a deep clean (which I advise you to do at least once a month) I use baby shampoo, This is great for the bristles as it wont cause any damage. Dampen your brushes, massage in the baby shampoo, rinse and then leave to dry thoroughly before you use them again.

You don't have to be a professional make up artist to know what your doing with make up, if you just have the right tools and confidence you can look and feel gorgeous all the time!
Hopefully this has been helpful and for those of you who requested this I hope I answered the questions you had!  Don't forget if you do have any questions or further requests please get in touch!

Happy Make Up Monday
Stay Gorgeous

Grace x

Saturday, 14 May 2011

Weekly Blog Round Up - week 7

Take a look at the best of the best from this week, Don't forget to follow these blogger beauties and show them some love!


The Nail Addict created a gorgeous water marble design http://thenailaddict.blogspot.com/2011/05/pink-water-marble-design.html

Jen celebrated pink Wednesday in style http://moondancerjen.blogspot.com/2011/05/big-fat-bow.html


Theresa reversed the French in black and silver http://theresabloor.blogspot.com/2011/03/nail-design-of-day_31.html

Stacie painted her nails to match her dotty 50’s dress http://kawaiinailart.blogspot.com/2011/05/whats-black-white-and-red-all-over.html


AJ used her BM plates to create a cool herringbone pattern http://thatssofresh.blogspot.com/2011/05/pink-wednesdays.html


And finally introducing Ari she is new to blogging http://ari-sweetdelight.blogspot.com/2011/05/nail-design-strawberry.html

If you would like to be involved in future round ups contact Stacie at http://kawaiinailart.blogspot.com

Have a great weekend!

Stay Gorgeous

Grace x

Friday, 13 May 2011

French Leopard

A lovely friend of mine bought me a little pressie earlier in the week, it was a Max Factor mini nail polish in Diva Coral. Its such a great colour for summer and coral is one of my all time favourite colours!

I had intended to just paint my nails in the coral shade but I decided that wasn't much fun so I came up with this design instead!


I used the Diva Coral shade for my base, then using Konad plate M57 I stamped on a leopard design with a black nail art paint, then to create the black french tip I used Obscurity from OPI.

This is a super easy design to do, you can put your creative spin on it and change the colour.  If you give it a go I would love to see the results so send me some pics!

If you would like to see how I achieved this look take a peek at my tutorial video.


Stay Gorgeous

Grace x

Wednesday, 11 May 2011

A wedge of hotness!

With summer on its way I'm sure that everyone has been stocking up on flip flops and jewel encrusted sandles that are filling the shelves of our favourite stores. But one key item we must not forget to buy is the wedge heel!

They have been sneaking in to all the fashion magazines over the past month or so, but after Kate Middleton was spotted wearing a pair whilst strolling around the grounds of Buckingham palace the day after the wedding, the world has gone Wedge mad!

The pair our future queen wore were from LK Bennet and as you can imagine flew off the shelves and have now sold out nation wide! But fear not there are plenty of other options! Here are a couple I have found that you may like!

Office have brought out these beauties which come in Red, Aqua and Black and are priced at £60.  
They are featured in Look Magazine this week after Chelsy Davy was spotted trying them on, so hurry girls I feel another sell out coming on!

This pair are from H&M and are available in Black, Tan and Navy & White stripe, they are priced at a very reasonable £14.99. The wedge on these is quite a lot lower which makes them more casual and perfect for the office.

With bright colours being top of the trend list over the next few months we are spoilt for choice with all the shoes and accessories that are available, so don't just brighten up your clothes make sure you rock the colour block all the way down to your feet!

For those of you who aren't great at strutting in heels (and yes I am one of you!), choosing a wedge heel is a great option as your feet have more support and there is less chance of you toppling over, although that may depend on how many cosmopolitans you have had!

I cant wait to wait to come off my crutches so that I can wear nice shoes again, so make sure you leave at least one pair for me!

Stay gorgeous

Grace x


Monday, 9 May 2011

Eye Brow Perfection!

One of my favourite treatments to do as a beauty therapist has to be Eye Brow Shaping,  The reason for this I think is that quite simply I am a perfectionist! Your eye brows frame your face and if they are shaped well it can make a whole world of difference.

A huge amount of people are happy plucking away at their brows themselves, but for those of you who just can't be trusted when in charge of the tweezers, people like myself are on hand to help!  My most important piece of advice for people shaping their eye brows themselves is, when you hear yourself say "oooh I will just get that one little hair" put the tweezers down and step away from the mirror!  That one little hair can be the start of a disaster, you could go from looking hot to a hot mess with just one pluck, if you take that one hair and it doesn't look right you will take one more, and then another and before you know it you will have a line so thin we have to squint to see it!

So I am going to give you a guide that you can follow to help you achieve perfectly shaped eye brows.
Now before I start please remember you can only work with what you've got! You would be surprised how many times I have been asked for the eye brow book so my client could see what design they could have or if someone could have their eye brows like J-Lo, unfortunately it doesn't work like that, but fear not I have a few tricks up my sleeve!

The most important thing is to know where you should and shouldn't take the hair from,
This guide tells you exactly that.  You can use any thing from an eye liner pencil to an orange stick as a measuring guide.  Place your guide at the very edge of your nose and run it up so it passes through the inside corner of the eye (A) this shows where the eye brow should start, no further towards the bridge of the nose and definitely no further towards the eye!  Then with your guide in the same starting point, looking straight forward place it so it passes through the pupil of your eye (B), this will show you where the arch of your eye brow should be, and lastly place the guide so it runs in line from the nose to the outer corner of the eye (C), this is where the eye brow should end (some peoples eye brows wont be this long naturally).
As you measure these points out mark them with an eyeliner so you can see where to tweeze!

Now you are ready to remove the hair, I would still say tweeze with caution, remember you can always come back to it but you'll have a hard time sticking them back on!

When I shape my clients eye brows I tend to use a mixture of techniques, waxing, tweezing and threading.  All of these do the same thing but all have their own little advantages.  Waxing and tweezing have been around forever but threading has become very popular over the last couple of years, this technique allows the therapist to remove a row of hairs at one time and gives a very precise finish.

Now for those of you who have been a bit tweezer happy or just want a more definite look for your eye brows I have a great product that you will love!


Everlash Eye Brows is an amazing product that can help you achieve perfect J-Lo eye brows!  You simply choose the correct colour for you and then using a stencil you dab the powder on and hey presto brow perfection!

The palate pictured is my professional one with all the colours,  so you can see there are 8 to chose from so there will be a colour to suit you.  The retail kits come with one colour powder, a brush and three stencils.

The stencils come in three sizes, thin, natural and thick. They makes drawing on your eye brows so easy and the result is great.  To see how to use the everlash eye brow kit and to get a better look at how to measure your eye brows ready for shaping take a look at my video.

I hope this gives you more confidence when it comes to shaping your eye brows, but if you have any questions please feel free to ask.

Stay Gorgeous

Grace x

Saturday, 7 May 2011

Weekly Blog Round Up - week 6

Take a look at this weeks best of the best!


Sharon was inspired to try a new rainbow look http://polishinfatuated.blogspot.com/2011/02/rainbow-nails.html


The Nail Addict showed that spring has sprung http://thenailaddict.blogspot.com/2011/05/third-spring-manicure.html


Emily had a creative idea for her rainbow manicure http://emilysnailfiles.blogspot.com/2011/04/its-meee-mario.html

Nicole used funky donkey for some funky nails http://nicnacksnails.blogspot.com/2011/05/opi-funky-donkey.html


Grace has a touch of wedding fever with bridal inspired nails! http://ooooohpretty.blogspot.com/2011/05/well-i-know-that-most-of-wedding-fever.html

If you would like to be involved in future round ups contact Stacie at http://kawaiinailart.blogspot.com

Have a great weekend

Stay gorgeous

Grace x

Friday, 6 May 2011

Chanel Chance Tendre - Review

Whilst reading through Look Magazine a few weeks ago I came across an offer for a FREE Chanel Charm Bracelet!  Naturally I thought there must be some kind of catch, what did I have to but to get it?  The answer....Nothing!

All you had to do was pop along to a Chanel counter and have a fragrance review, hand in the page from the magazine and they will hand over the bracelet in return!  Now obviously we aren't talking about a 9ct gold bracelet dripping with gorgeous charms but I was surprisingly pleased with what was handed over!
The bracelet is made up of three pastel coloured ribbons (green, pink and yellow) which are great for spring and summer, and a small silver charm in the shape of the lovely Chanel Chance fragrance bottle hangs delicately!

Now I don't know about you but I am really quite fussy when it comes to perfumes, so the idea of have a fragrance consultation was verging on the edge of painful in my mind as I assumed that a hard sell was about to come my way!  Well I couldn't have been more wrong, the assistant we saw was lovely and simply asked if we had tried the new fragrances Chance Tendre and Chance Fraiche, when we replied no she gave us some samples to take away and try and off we went.

The reason I am so picky is that some perfumes give me a headache and on my first sniff of Chance Fraiche I knew it wasn't for me, its quite a light smell but a tad too earthy for me.
Then I tested the Chance Tendre, I instantly loved it. Grapefruit, Quince, Jasmine and white musk blend together to give it a warm fruity yet floral scent, this fragrance verges on the heavier side but still has a freshness to it that gives you that summer feeling!
Chanel Chance Tendre is available in 50ml and 100ml
One of the samples I was given was the Sheer Moisture Mist, I'm not a huge fan of layering up on my perfume but I have to say I really liked this as it had just enough of the  gorgeous scent to not be over powering!  The mist is really fine and doesn't leave the skin with a sticky film like some others.  This is the perfect product for the summer for those of you who maybe don't like to pile on the perfume on those hot days!
Chanel Chance Tendre Moisture Mist is available in 100ml

So if you are Look reader and still have your copy from a few weeks ago, I would definitely say pop to Chanel darling to get your free gift and try out their new fragrances!

Stay Gorgeous

Grace x

Thursday, 5 May 2011

Bridal Nails!

Well I know that most of the wedding fever has now passed after the spectacular royal events of last weekend, but I still have a little bit left to share with you! I had a couple of requests on my Facebook page to do some bridal nail designs so that is exactly what I have done!

Over the past ten years I have helped many brides get ready for their special day whether its doing their hair, make up or nails, It is an honour to be part of the festivities especially when people are telling them how beautiful they are or looking at the photos, you know you are partly responsible!  Now with that honour comes quite a big responsibility as what you do for your bride will be held against you forever in the evidence that will be the wedding photos!  The Hair and Make up in my opinion is the easy part, as it will be such a focal point you know what you need to do for it to look great on camera but sometimes its the smaller details that get a bit forgotten......the nails!

Over the past few years it is a common theme to have a photo taken of the newly weds hands interlocked to show off their sparkling rings, but if you've had a bad shape and paint or your husband has bitten his nails away with nerves it will be there for all to see!
So this is where I can come to the rescue!  The most simple and obvious thing to do is have a manicure, this will ensure your nails are freshly shaped, elegantly painted and not a dry cuticle in sight, but what about the polish?
Well most brides do tend to keep their polish very simple with either a nude or light pink colour or a french polish, but for those of you who are slightly more adventurous I have come up with a few designs that are the perfect finishing touch for your photo ready nails!

 For this design I have taken the classic french polish and simply added a row of nail gems along the tip on the ring finger, you could choose to add the gems to all the nails if you preferred. I used one coat of Heart throb for the base and Alpine Snow for the tip both from OPI 

For this alternative french polish I used Konad plate M56 to give a lacy finish.  For a more subtle look I just used the stamp to create the effect and to make it more definite I used a white nail art paint to add a line under the lacy tip.  I used Suzy and the lifeguard from OPI for the rose colour on the nail.
 This design is perfect for some one who wants to have a simple look as the detail is really delicate. I used Suzy and the lifeguard for the base colour and then using a dotting tool created the flowers using a white nail art paint and then a gold glitter to add the dot in the centre of the flowers.

This fancy french polish is slightly more extravagant but I love it! The white tip is shaped into a point where I have placed a pearl and then using a white nail art paint I created the detailing of curved white lines and then tiny dots starting from the outer edge of the pearl. I used Heart Throb and Alpine Snow from OPI for the varnishes. 

Hopefully these designs have given you some inspiration.  Did you have nail art on you nails for your wedding day? if you did I would love to see what you had.  Or do you have some ideas you would like to share?

One last thing for you to do..... book your groom in for a MAN-icure, you cant have him missing out on all the fun!

Stay Gorgeous

Grace x


Wednesday, 4 May 2011

Squeaky Clean!

Being a complete product junkie means that pretty much every part of my daily routine involves some sort of beauty product (its hard not to being a beauty therapist!) and it literally starts from the moment I wake up!

I love my bed and sometimes find myself having to physically drag myself out of it but I have found the perfect wake up cure......Soap & Glory!

As most of you will know from reading some of my previous posts I am a complete S&G addict, but I genuinely do think these products are as good as they say they are.

So it's a common known fact that a cold shower will wake you up but seeing as I feel that verges on the edge of torture I think that keeping the dial on warm and adding a good shower gel will do just the trick!
My favourite shower product is Clean on me, at first I liked it for the smell alone but after using it for about a week I realised that my skin was feeling extra soft too!  This is down to the mandarin peel extract that will have a very subtle ex-foliating effect and a built in moisturiser, and like all the products I have tried from their range it does exactly what it says on the tin by leaving you feeling clean and moisturised!  
This is a mini size that came from a gift set!
The Clean on me comes in a 500ml bottle with a pump dispenser and retails at around £5.00, it also comes in travel sizes too.

So I am already happy with my morning routine, that was until a little package came through the letter box! On twitter @soapandglory had tweeted that they wanted reviews on one of their lip glosses and the first 50 people would receive a free product, well I sent one in and next thing I know I now have another product to add to my collection and my morning routine has become a little bit more fancy!


Peaches and Clean Its a shower gel with ex-foliating beads, with ingredients like Peach and pineapple extracts (fruit enzymes) plus the buffing beads you know its going to smooth and soften the skin a treat. The scent of this product is more fruity but still fresh so you feel nice and clean once you step out the shower!

All you need to do now is finish off with your favourite body moisturiser (bet you cant guess who mines by?!) and your done ( in the bathroom any way).

So if you are anything like me and will hide under the duvet until the last possible minute I'm sure you will like any product that will help ease you in to awakeness!

Stay gorgeous

Grace x